

.avif)
.svg)
Please note that 'Variables' are now called 'Fields' in Landbot's platform.
Nowadays, differentiating yourself among the many PPC ads is quite a challenge. That’s definitely one — but not the only — reason why you should consider using a website chatbot to put a twist on your campaigns and improve conversion rates on your website.
PPC ranks fifth among the current top channels for lead generation, making it attractive to marketers worldwide. In fact, nearly half of businesses around the globe already spend up to $10.000 per month on PPC advertising, and the market is predicted to keep growing at a considerable rate in the coming years.
While effective, the channel is heavily competitive, requiring marketers to create ever-more creative campaigns, more efficient optimization strategies, and more thorough tracking.
One such strategy is using a chatbot on your website to add a new dimension to your campaigns and boost conversion rates.
In this article, we’ll explain how to create a website chatbot and use it to improve PPC performance and increase conversions on your website.
PPC Campaigns: A Key Use Case for Marketing and Lead Generation Agencies
If you’re a marketer and/or working at a lead generation agency, you know that running effective PPC campaigns is a critical service offering.
You’re probably often tasked with maximizing ROI for your clients' ad spend, which makes PPC a core component of your lead generation strategy.
So, how exactly do you boost your PPC campaigns’ performance and improve the conversion rates from your Google ads?
As mentioned above — chatbots.
Website chatbots are powerful tools for enhancing campaigns by engaging potential leads immediately after they click on an ad. Whether your agency specializes in e-commerce, B2B, or any other sector, integrating chatbots into your PPC campaigns can significantly boost conversion rates, streamline lead qualification, and provide valuable insights into lead behavior.
Let’s take a closer look at why that happens below, but before, let me offer you an extra tip to boost your campaigns’ performance.
The speed at which your landing page loads can be the different between capturing or losing a lead. As soon as a lead clicks on your ad, they expect a fast and seamless experience. If your page takes too long to load or fails is displaying your chatbot altogether, you risk leads abandoning the page and you wasting your ad budget on something that won’t convert.
This is why we recommend implementing a pre-landing page — a standalone page that loads before the chatbot interface. To put it simply, the pre-landing page serves as a buffer that captures leads’ attention and encourages interaction, while heavier elements such as your web chatbot are reserved for after the user engages with the page.
A pre-landing page includes just a few simples elements, which means it doesn’t suffer from slow loading times and so ensures a positive first impression. Check out this Knowledge Center article if you want to learn more about pre-landing pages and also see a few examples of pages you can implement.
Now, back to chatbots!
The Conversion Power of Conversations
By engaging leads with a website chatbot, you’re already one step ahead to improving conversion rates.
Chatbots are designed to enhance user interaction, which naturally leads to higher conversion rates. Based on numerous campaign tests, on average, a bot converts 20% better than a static landing page or website.
However, there’s no limit to how good the results can be.
For instance, thanks to conversational campaigns, our sales team was able to raise the number of booked meetings by 100%. Similarly, Landbot client, Arora Project, managed to triple their lead acquisition while slashing their CPL by 30% using a web chatbot:

One reason such results are achievable is the possibility of continuously A/B testing various conversation flows and instantly having a very detailed insight into the chat drop-off points. This allows you to rework the copy and improve the flow in real-time.
Step-by-Step to Setting up Your Website Chatbot for PPC Campaigns
Efficient and accurate tracking is the key to the success of any PPC campaign, chatbots included.
To accurately monitor your campaigns, you need to be able to connect them to your main monitoring tool, such as Google Analytics, as well as to set the goals for your Google Adwords campaign.
This tutorial will guide you through setting up a website chatbot, configuring Google Analytics 4 (GA4) for accurate tracking, and integrating your PPC goals with Google Ads to improve PPC performance.
Step 1: Build Your Web Chatbot
Landbot offers you different ways to build your website chatbots.
You can create your chatbot from scratch using our no-code builder, with our AI Assistant, or using one of our chatbot templates.
If you’re completely new to chatbot building, we recommend taking the Web Chatbot Building Course in the Landbot Academy, or watch the video below:
Step 2: Set up Google Analytics Inside the Chatbot Flow
Once you’ve built your chatbot, you need to add the Google Analytics block to the conversation flow.
It’s important to note that you can add more than one Google Analytics block inside the same chatbot. Doing so comes particularly handy when the flow is long and complex and aims to achieve not one but several objectives. For the purpose of this tutorial, we’ll only use one block as the process would be the same for each additional one.
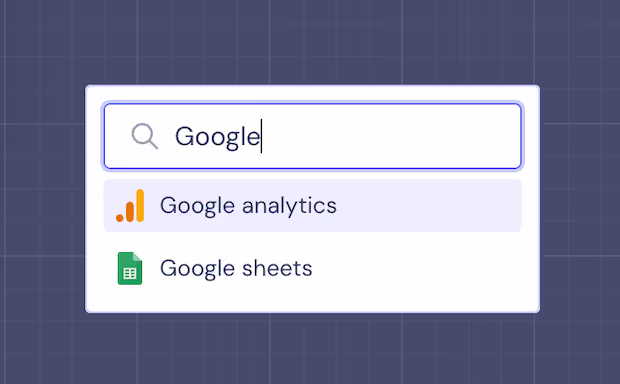
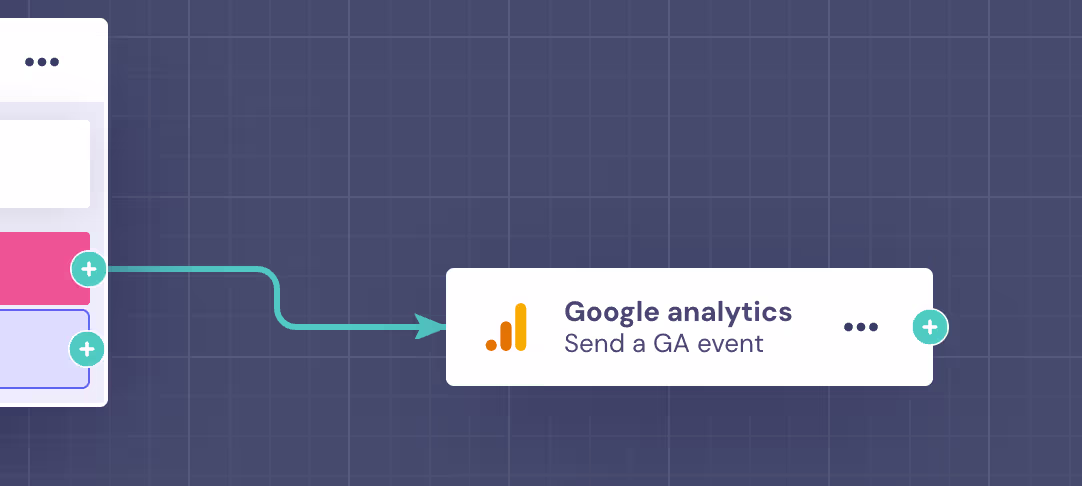
Draw a green arrow from the selected place in the conversation flow — one that indicates a goal you want to record — and choose the “Google Analytics” block from the menu:
It will appear in the flow as follows:
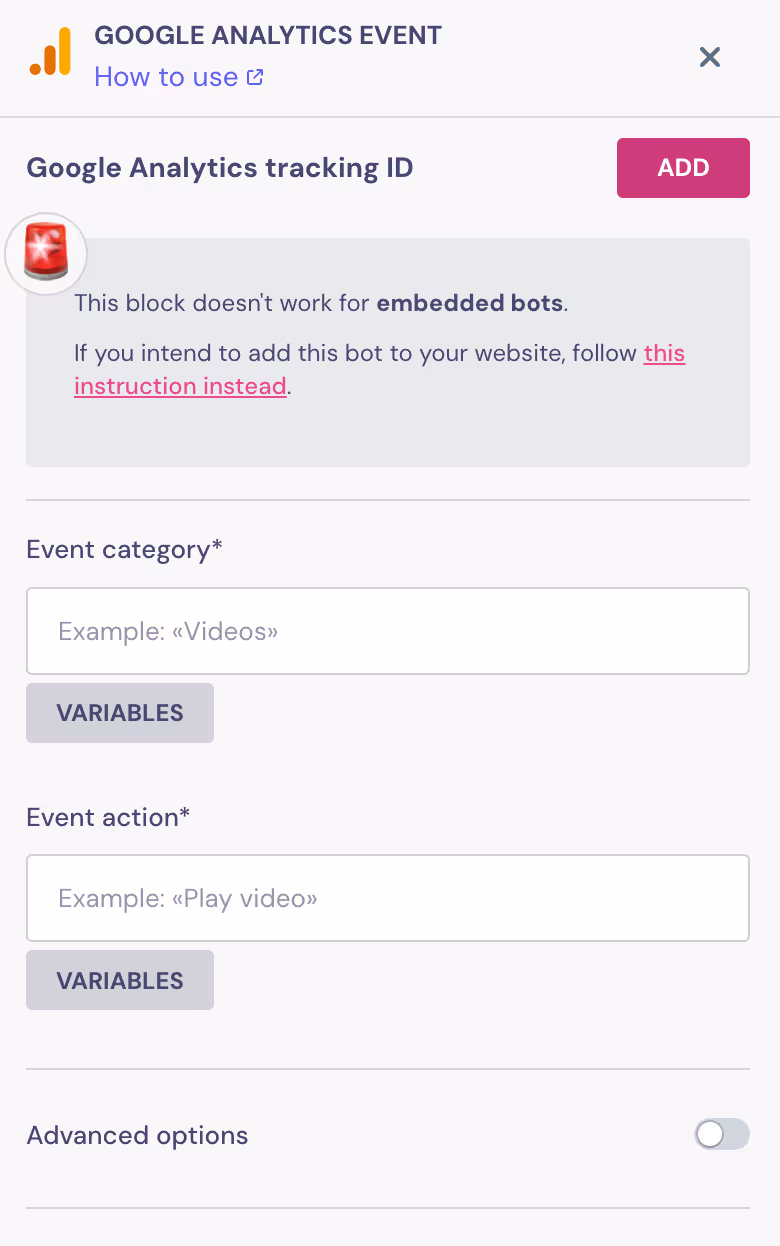
Now, it’s time to configure your Google Analytics ID.
First, click the Analytics block to open the block’s editor. Next, click “Add Google Analytics Tracking ID:”
Upon clicking the button, the Landbot app will redirect you to the “Settings” section of the bot-building canvas, to the subsection “SEO & Tracking.”
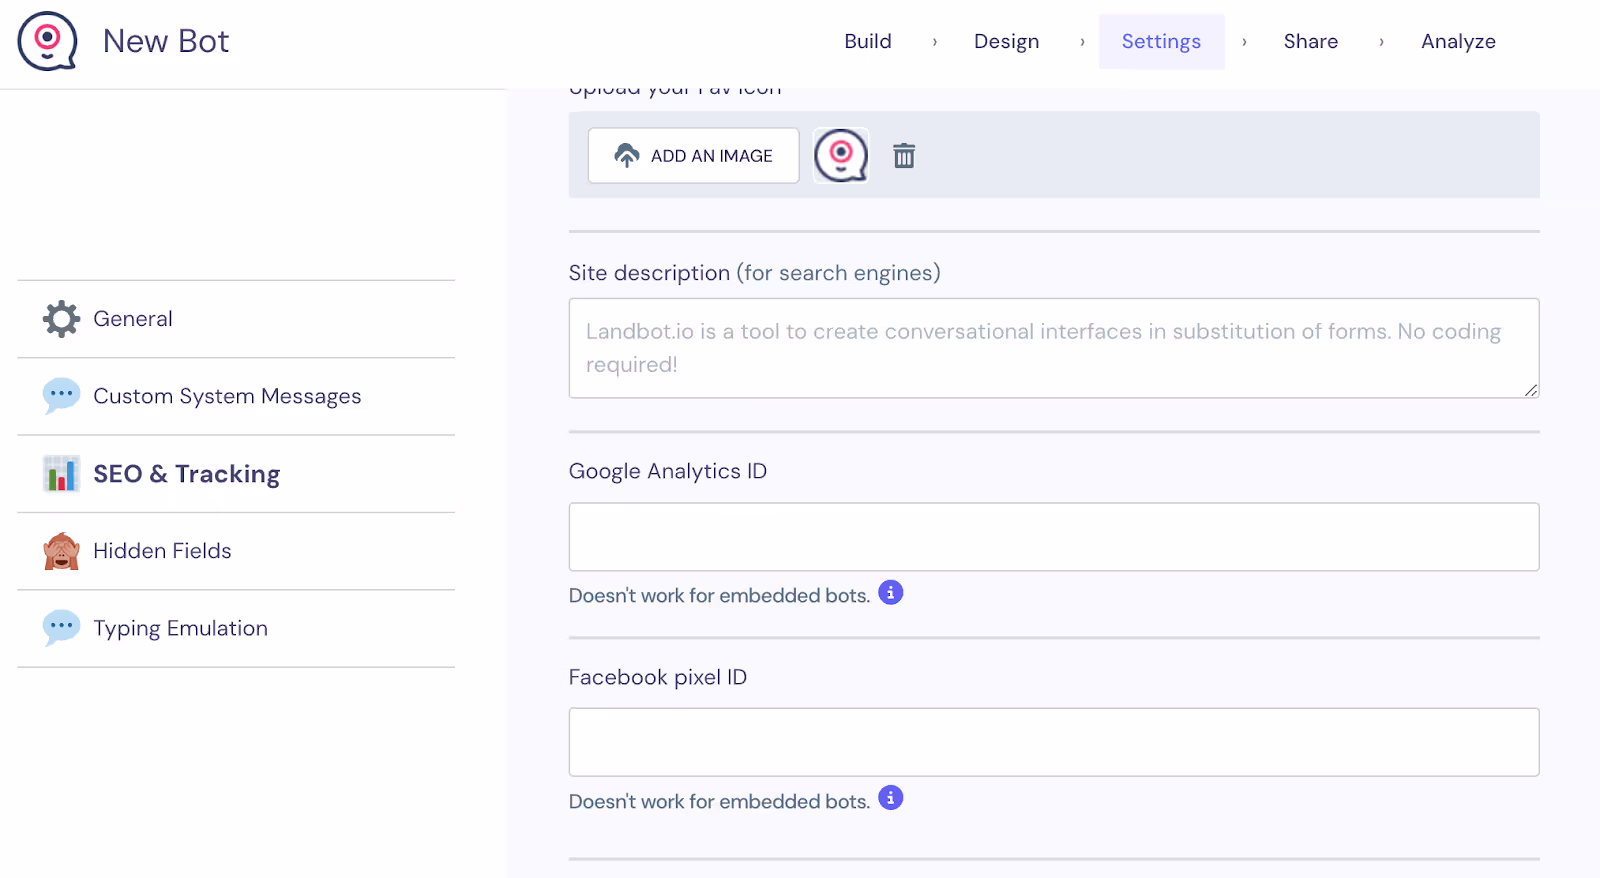
Once there, paste your Google Analytics ID in the designated field and click the “Apply Changes” button that will show up at the bottom of the page.
Lastly, you need to return to the Google Analytics block and configure it with the data of the event that you want to track. It's simple — all you need to do is fill in the compulsory fields and assign a value to the objective. When you’re done, click “Apply” to save the changes.
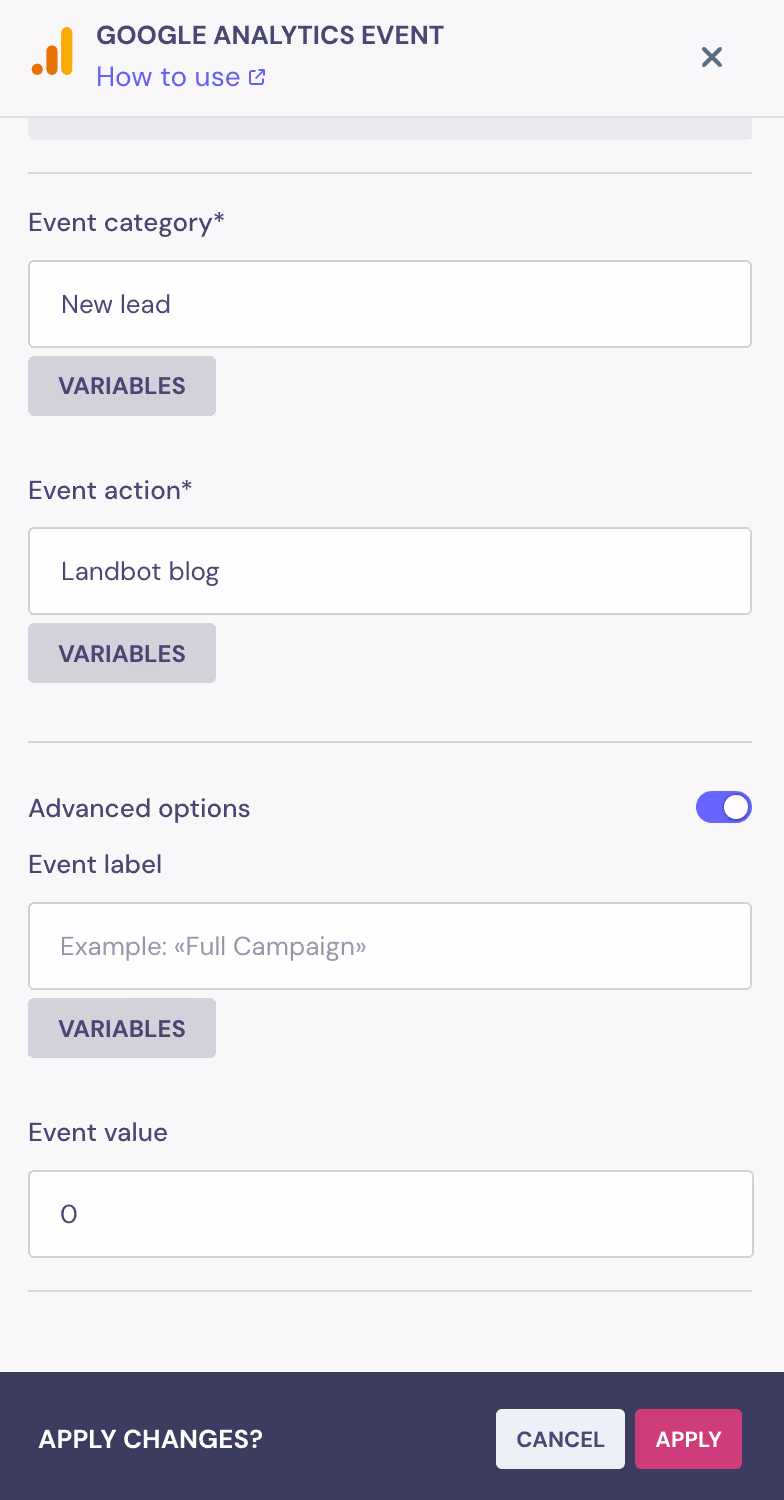
Please note: If the Google Analytics block is set up and running already, you can always verify if the set-up is working correctly by clicking “Verify this Goal.”
Step 3: Configure Google Analytics 4 (GA4)
Now, let’s look at how to configure the settings inside GA4 so that you can track events triggered inside the web chatbot.
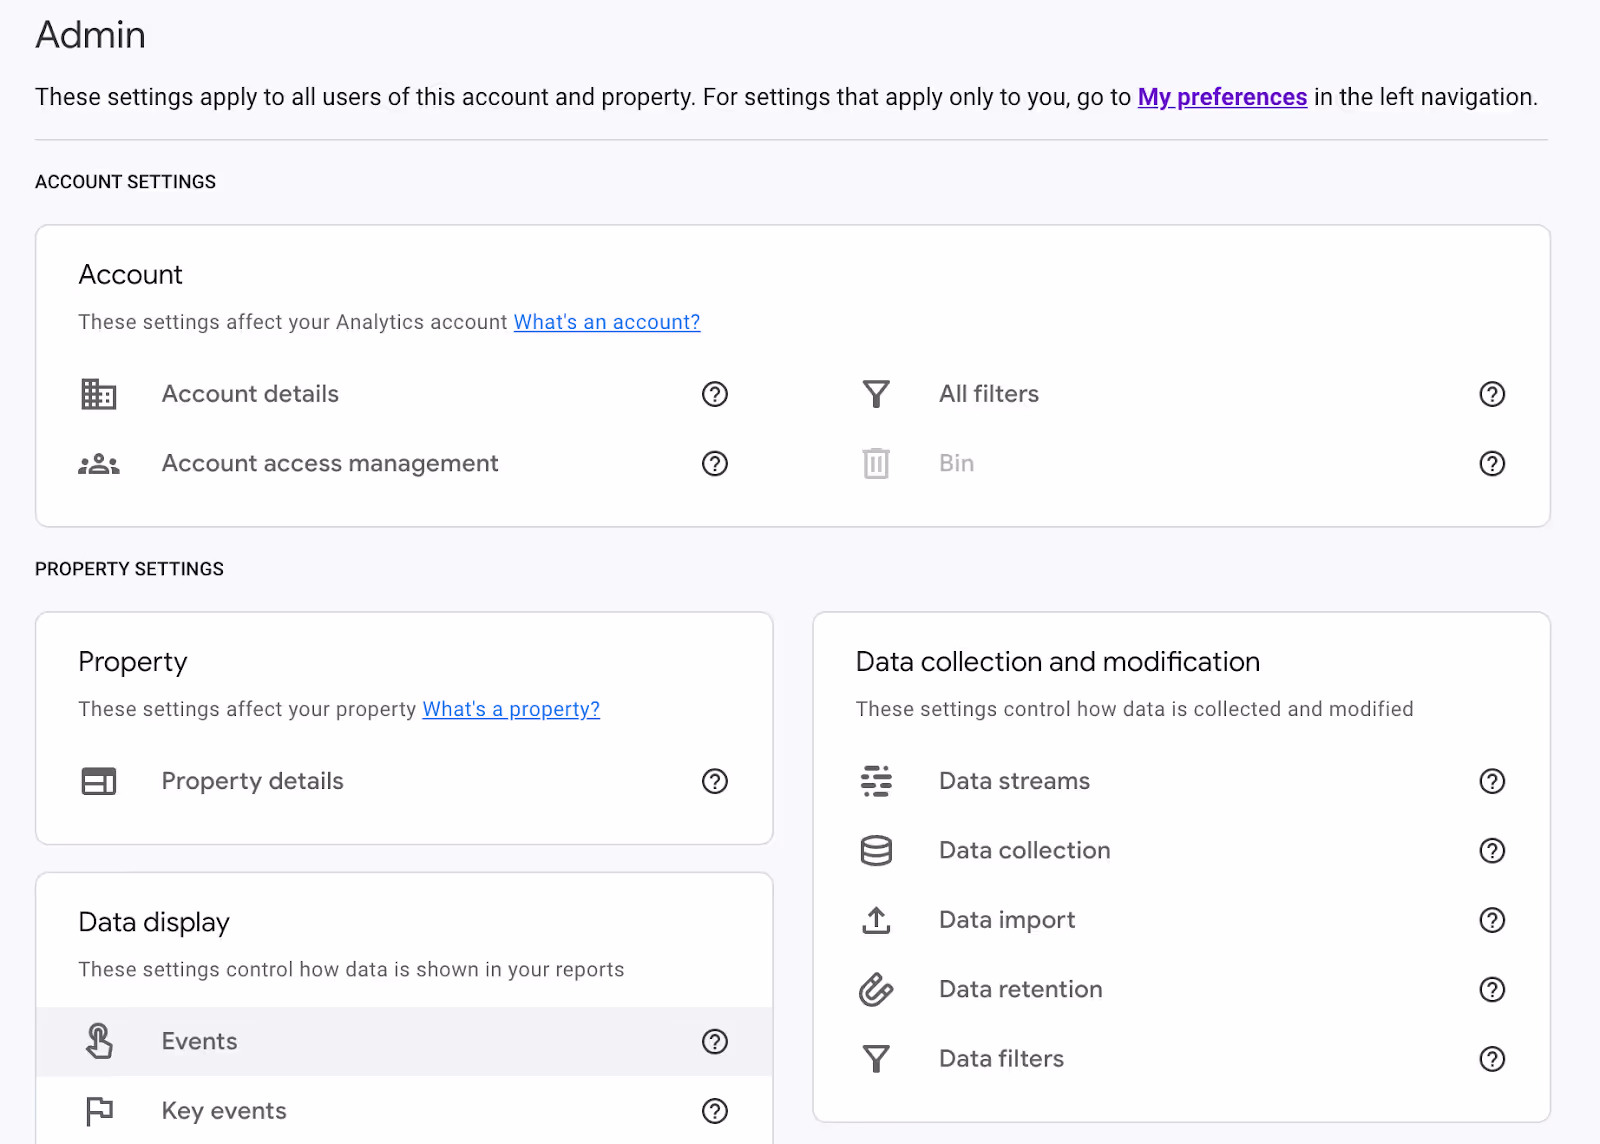
The first step is to create an event in GA4. After you’ve logged in to Google Analytics account and selected the property you wish to configure, navigate to your Admin panel, and under the “Data display” section click on “Events.”
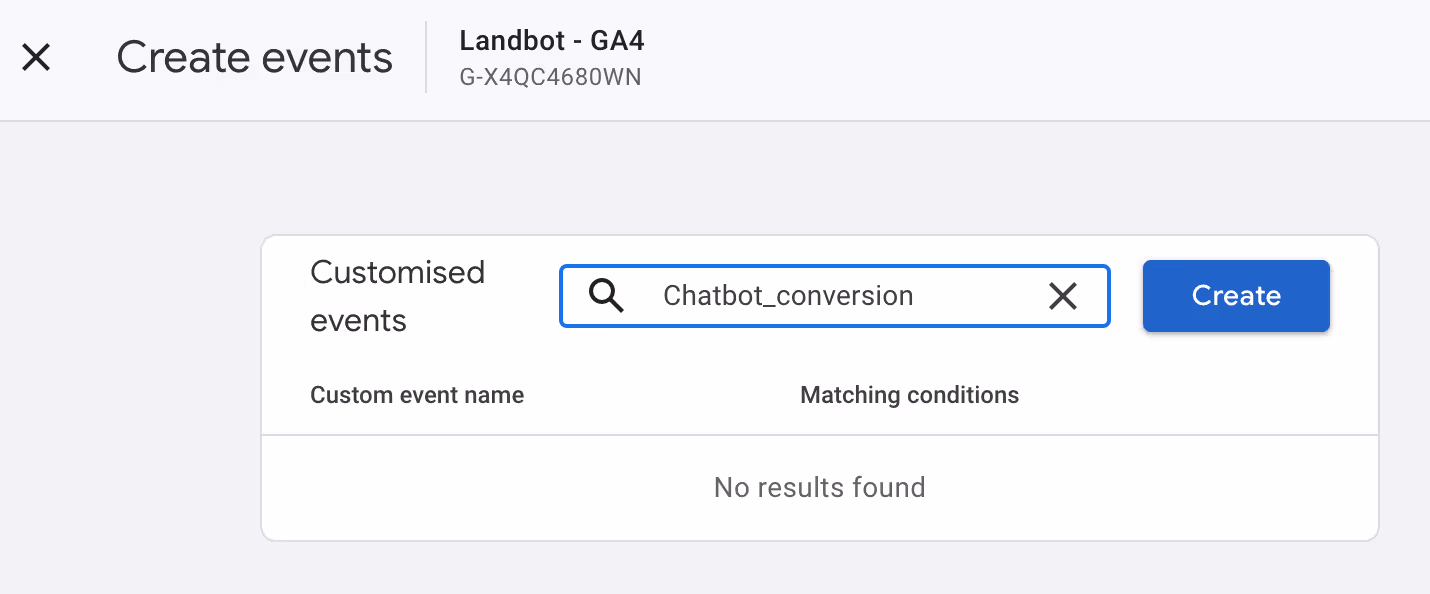
Next, click on the “Create Event” button. Name your event as you see fit, for example, Chatbot_conversion.
Next, define the conditions for your event. For example, if you’re tracking a button click inside your web bot, you might want to set a condition like event_name equals button_click.
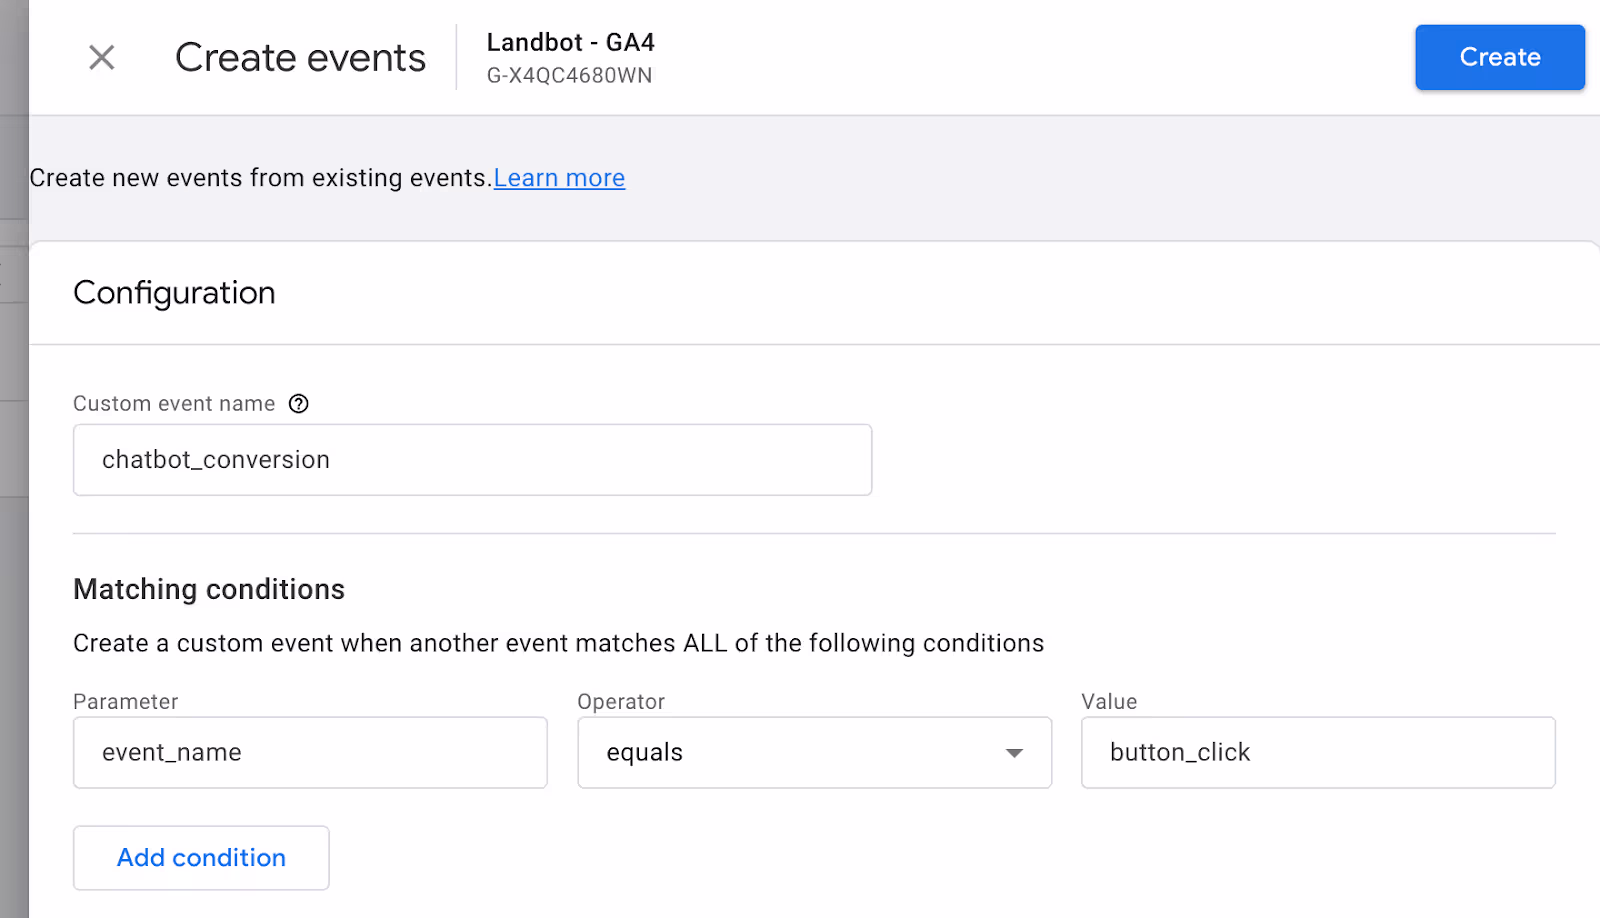
Finally, once you’ve configured all the necessary parameters, save your event. This will now allow GA4 to recognize this specific interaction with your chatbot as a tracked event.
The next step is to configure key events (previously called conversions) in GA4.
Still under the “Data display” panel, locate “Key events” and click on the “New key event” button.

Enter the exact name of the previously created event, in this case, “Chatbot_conversion” and click save. This event is now recognized as a key event (or conversion) within GA4.
Before proceeding to the next step, verify your setup. To do so, you can trigger the event in your website chatbot and checking the “Real-time” report in GA4 under the “Reports” section.
Your event should appear under the "Key events" section in real-time, confirming that GA4 is tracking it.
Step 4: Configure GA4 Key Events Tracking in Google Ads
The last step in setting up a website chatbot for your PPC campaign is to integrate GA4 key events with Google Ads to ensure your PPC campaign goals are aligned with the events tracked in your web bot.
For that, go ahead and log in to your Google Ads account. Then, go to the “Tools” menu, select “Data Manager” and navigate to the “Connected products” tab.
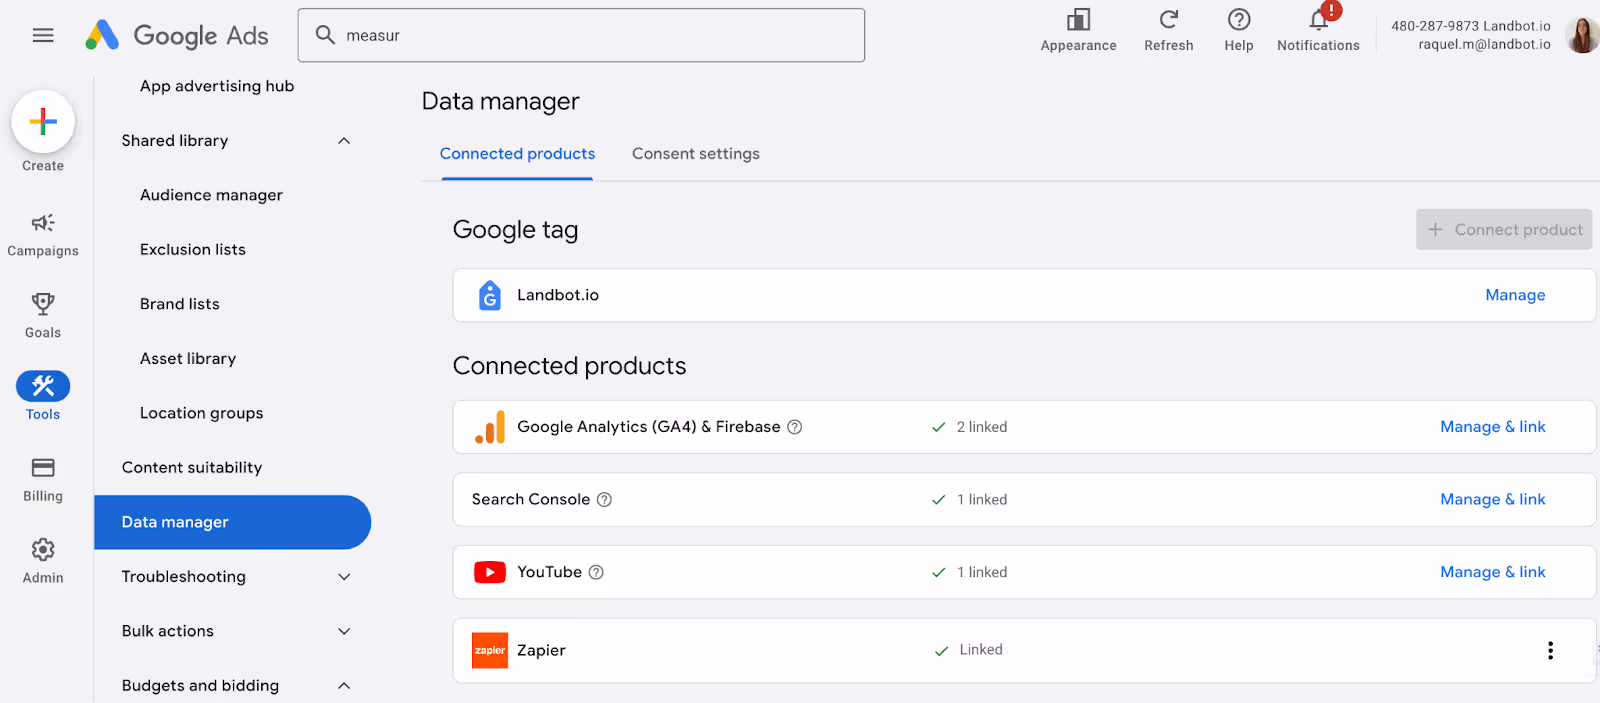
You’ll notice here that my GA4 account is already connected. But when that’s not the case, click the “+ Connect product” button.
Under “Data source” click “Google Analytics (GA4) & Firebase,” find a Google Analytics property or a Firebase project from the list, then click “Next.” Finally, review your selection and click “Link.”
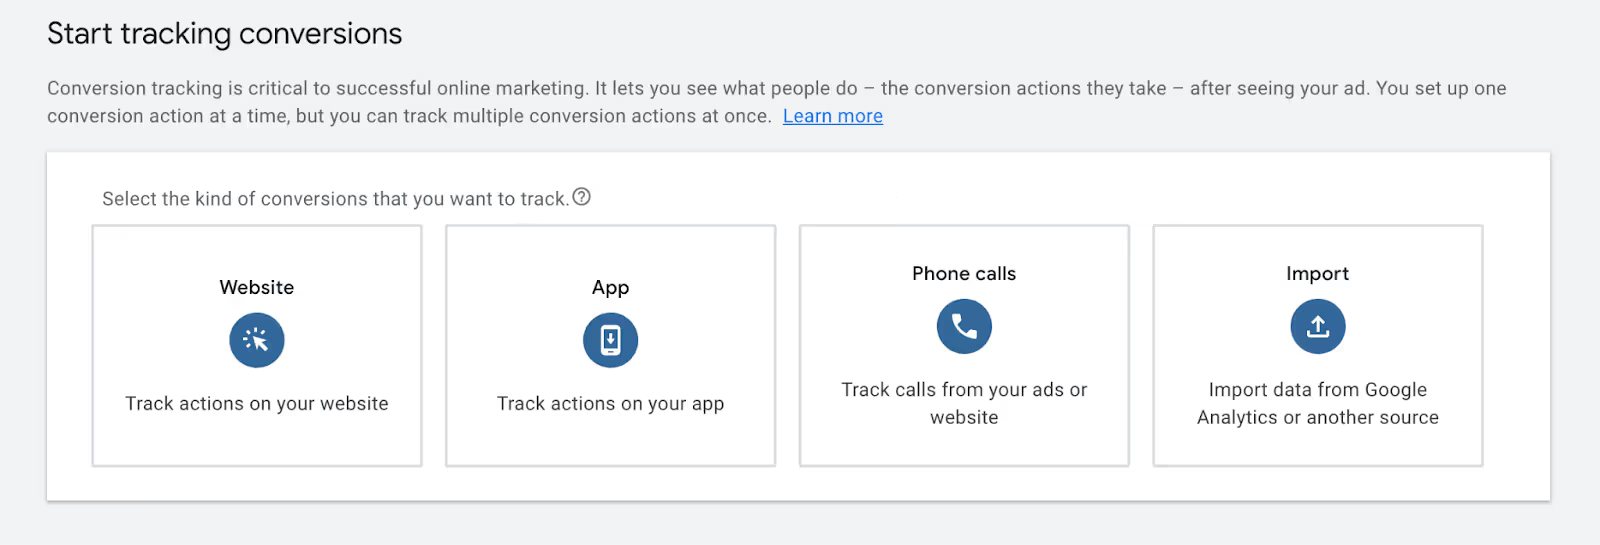
Once you have connected your Analytics and GA4 accounts, go to “Goals”, then select “Measurement” and click on the “+ Create conversion action” button. Next, select the “Import” option.
Next, select what you want to import, in this case, GA4 properties to then select the Google Analytics property you have connected earlier.
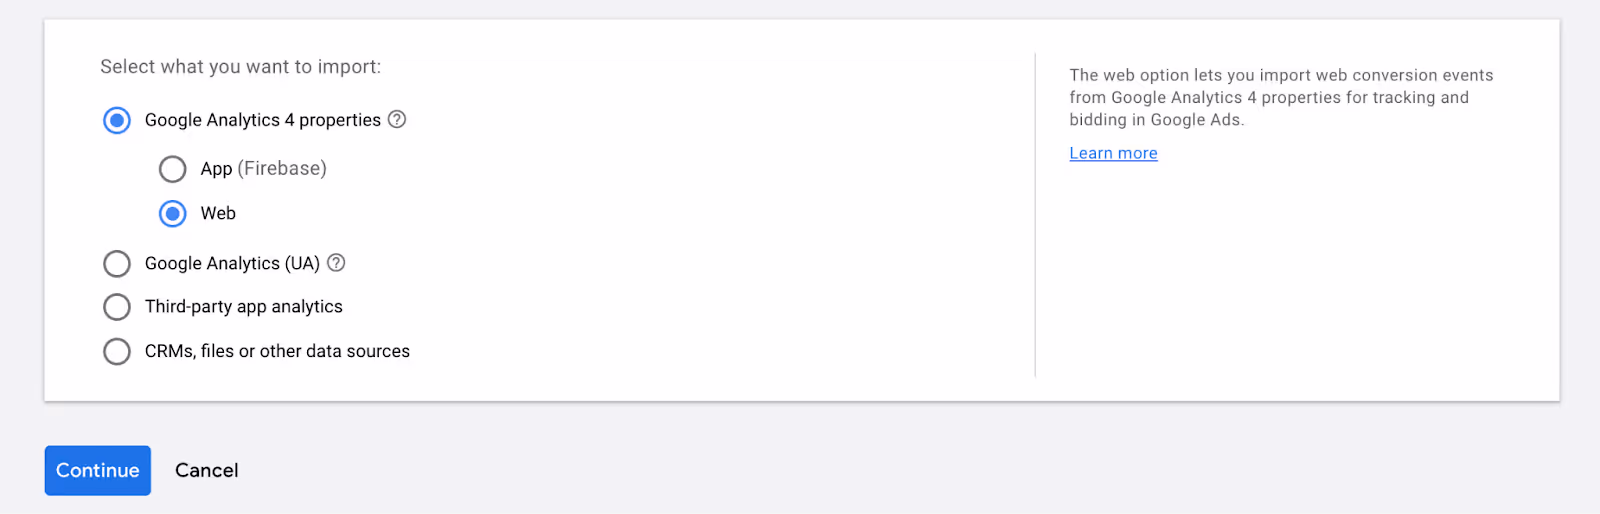
Finally, select the key conversion event — “Chatbot_conversion”— and import it. After importing, your conversion is ready to be used in your Google Ads campaigns.
And that’s it!
Conclusion
PPC campaigns are a powerful lead generation channel. Though, as a marketer, I know that no matter how effective they are, they can always be better.
Using website chatbots for PPC engages leads from the get-go and allows you to track leads’ progress through the conversation and collect crucial data that will help you optimize your campaigns.
With the right tracking, you can optimize your conversion and reach excellent results every time!
.avif)


.avif)
%20(1).png)
.avif)