

.avif)
.svg)
Please note that 'Variables' are now called 'Fields' in Landbot's platform.
Understanding customer interactions with your online presence is key to improving lead generation, chatbot analytics, and refining strategic initiatives like audience segmentation, e-commerce optimization, and A/B testing.
What Helps You Make This Possible?
UTM parameters, URL parameters, and hidden fields are essential tools that allow marketers to capture and leverage data across various aspects of digital engagement. They provide deeper insights into user behaviors, enable personalized experiences, and streamline critical data management—all vital for maximizing the effectiveness of digital marketing.
This article will focus on how to implement these tools, such as how to use UTM parameters for lead generation strategies with web bots in Landbot. From setting up your first UTM tracking to enhance your performance analysis to fully personalizing your customers’ interactions or collecting and updating data from them, we’ll equip you with the knowledge to ensure your journeys are personalized and tracked without any missing points.
Understanding Hidden Fields, UTM, and URL Params in Chatbots
Let's first delve into what they are and how they work. Note: If you're already a pro with hidden fields, you can skip ahead to the section on enabling them in Landbot; if not, keep reading!
Hidden fields in chatbot conversations are like invisible helpers that gather and transfer important customer information across channels without cluttering the conversation.
These fields are especially valuable for managing URL and know how to use UTM parameters, which are snippets of data added to the bot's URL that contain crucial customer information:
- UTM parameters help identify where the customer came from, enabling businesses to track the effectiveness of marketing campaigns across digital platforms.
- URL parameters can include details like a customer's name, email, or other information that helps personalize their experience.
Operating quietly in the background, these fields, added to the bot's URL, ensure a smoother, more tailored experience for customers without them noticing the mechanics behind it.
How to Enable Them in Landbot
Now that you understand these tools and their purpose, let's explore how to implement them in Landbot. This will enable you to create comprehensive, 360-degree lead generation strategies that work effectively with chatbots.
We'll go through a real case scenario, following these essentials:
- Decide what information you will want to save and use while interacting with your customers and send it across your marketing channels, and the goal behind it to understand whether you want to add URL, UTM params, or both.
- Build the flow you want the bot to perform, introducing the variables you will add later in settings.
- Instruct the bot to manage that information in the background. This consists of two steps, depending on the type of param, you will go through both (URL params) or jump directly to the second one (UTM param):
- Adding the variables that will store the info into the URL params using hidden fields. — This step is done in the settings section
- You then just need to add those hidden fields to the URL. You can include both UTM and URL parameters in the same URL.
Let’s get to it!
A Real Lead Generation Example
To better understand the entire process, let's take a very common real-life example:
Imagine you're hosting a webinar on the latest trends in blockchain technology and plan to launch two paid campaigns to attract attendees. The objective is to generate qualified leads for the webinar, engage with them afterward, nurture these connections, and ultimately convert these leads into paying customers.
How to Use UTM Params to Track Acquisition Paid Campaign Traffic
Let’s focus first on the lead acquisition stage: You want the lead to click on your ads, register for the webinar, store their data, and understand their behavior. So, you want to launch two advertising campaigns—one on Facebook and another on Google Ads. Both campaigns feature links that direct potential leads straight to a chatbot, which serves as the landing page.
First Things First: What Information Would You Like the Bot to Manage in the Background?
To answer this question, you first need to ask yourself another question: What purpose will the information you save serve?
If the answer is tracking prospects’ behavior and chatbot analytics, for example, knowing where leads come from, what you want is to add a UTM parameter.
On the other hand, if you want to personalize the experience, you'll want to add a URL parameter.
You would want to identify the source of each lead to gather insights on which campaigns perform best and also to understand your leads' preferred channels. You don’t need to build two bots; you just need to add the correct parameters to two different URLs that you will display on each paid campaign. In this case, you will set up UTM parameters that help track the source, medium, and campaign of each lead.
As they are brand-new leads, you also want to store as much information as possible for later nurturing campaigns. Using the information collected in these bots’ campaigns, we will add URL parameters.
Let’s set them!
Start Building the Bot
First of all, if you’re not a Landbot user yet, you can sign up for free today! Once you have your Landbot account, go to the builder and add the blocks you need for your lead generation process. Consider the information you need from leads and add ‘Ask a question’, ‘Ask a name’, etc. This dedicated article can help you with some ideas on how to build a lead generation chatbot.
It is important that you set up the variables to store the relevant information, the one that you would probably want to push to your CRM or Database, and that, as said, will be useful for the after-webinar to follow up and nurture your leads. This process is very simple. Let’s say you want to store their name, their email, the city they are based in, and, of course, the product they are interested in, in this case, blockchain.
Each block you add performs an action or asks a question and can store that action or the answer within variables. If you want to know more about variables and understand how to use them properly, check our Academy video below:
All that lead information can be pushed later into a Registration Google Sheets and/or to your CRM. You have more information about integration and the setup instructions on our Knowledge Center. For integration setup instructions, visit our Knowledge Center.
Get Your URLs for the Different Campaigns With UTM Params
Now, to effectively track where your leads come from, you just need to add hidden fields with UTM information to the bot’s URL.
This is how our Landbot URL would look like initially:
https://landbot.pro/v3/H-2627333-NK3HB6VWPWQ9O4YV/index.html
Let’s add our hidden fields. The first hidden field should be preceded by a "?" and the rest should be separated by "&".
Following our example, we need to build two different URLs, one per campaign. We said we wanted to track the source, medium, and campaign of each lead. So the Facebook one would look like:
https://landbot.pro/v3/H-2627333-NK3HB6VWPWQ9O4YV/index.html?utm_source=facebook&utm_medium=paid_social&utm_campaign=blockchain_webinar
While the Google Ads one would be:
https://landbot.io/u/H-128508-D3ZDNDFXH0OU4G08/index.html?utm_source=google&utm_medium=cpc&utm_campaign=blockchain_webinar
These URLs will automatically tell analytics tools where the traffic came from (Facebook or Google), the campaign type (paid social or CPC), and the specific campaign name (blockchain_webinar). If you use Google Analytics, the parameter values are visible in the Traffic Acquisition Report.
Using URL Parameters to Follow Up and Nurture Leads
Imagine the webinar has concluded, and you're ready to follow up with your newly acquired leads and launch a nurturing campaign. This is where URL parameters can be game-changing. You've gathered valuable information about your leads, and now you can use it to create a fully personalized experience, boosting conversion opportunities. Let's walk through the same essential steps as before, this time focusing on building a chatbot for your nurturing campaign.
In this case, the information we want our bot to manage in the background through hidden fields is the data we collected and stored with our previous paid campaigns' bot: name, email, and product interest. Our goal is to personalize their journey, and we'll lead how to use URL parameters to achieve this. Thanks to this approach, we won't need to ask our leads for information we already have—it will be automatically applied to the new conversation when the lead first interacts with our bot.
For example, we can start by greeting them by their name, asking them how they liked the webinar information, and then inviting them to an exclusive onsite roundtable in their city or in case they are based in a city where you don’t plan to hold any, redirect them to your events calendar landing page.
Let’s see quickly how would we build this:
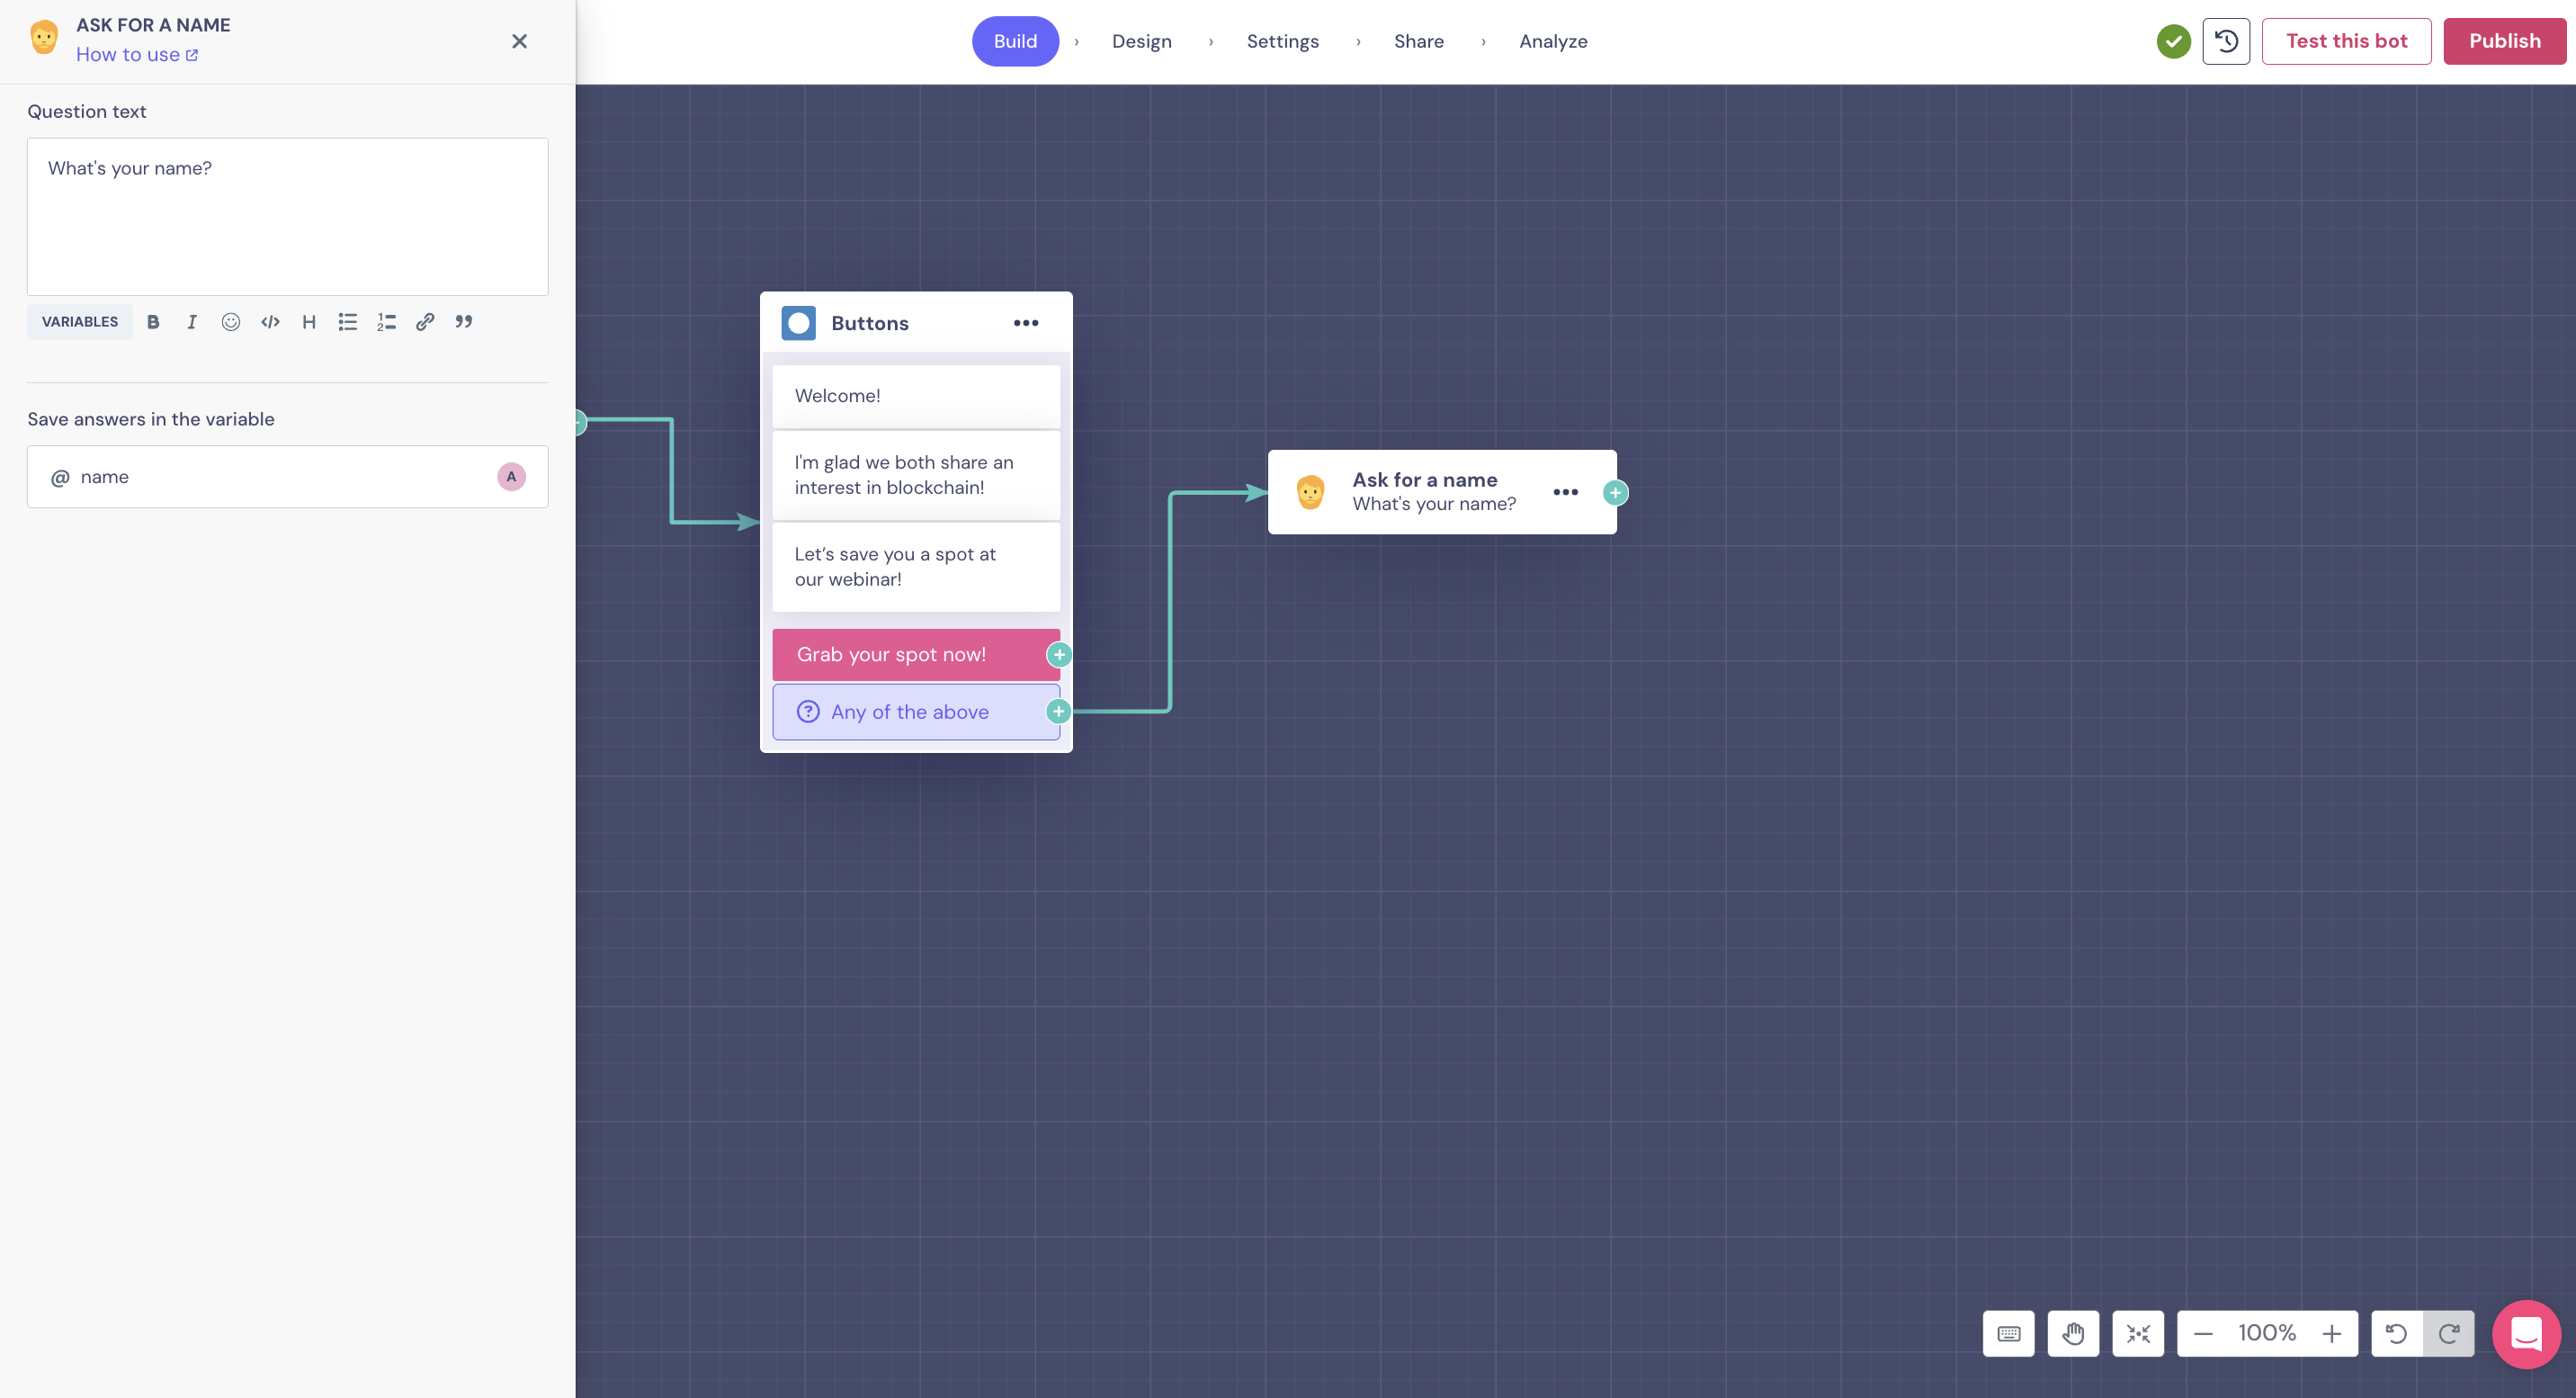
- First, add a button block to get the conversation started.
- Then, add a message block when you introduce the variable name. This way, the customer will be addressed by the name stored in your CRM or database. In the following steps, we’ll guide the bot in retrieving this information from the given URL parameter to use it accordingly.
- Finally, add logic blocks where you set the different city options and link them to new buttons, message blocks (or any other suitable block) where you will display the personalized info, such as the roundtable invite or the redirection to the events calendar landing page. This will take your customers on their personalized journey without asking them where they are based again.
This is how it would look like:

Did you find this bot example useful? It is ready for you to use as a template! Just edit it, hit publish, and start using it!
Now, with that information in mind, build the flow of your own nurturing bot and keep reading to understand how to set up the URL parameters in the background and instruct your bot on how to handle them.
How to Set Up the URL Parameter in the Background
So far, it's similar to the previous case. However, we need to add one more step to instruct the bot about the information it should handle in the background.
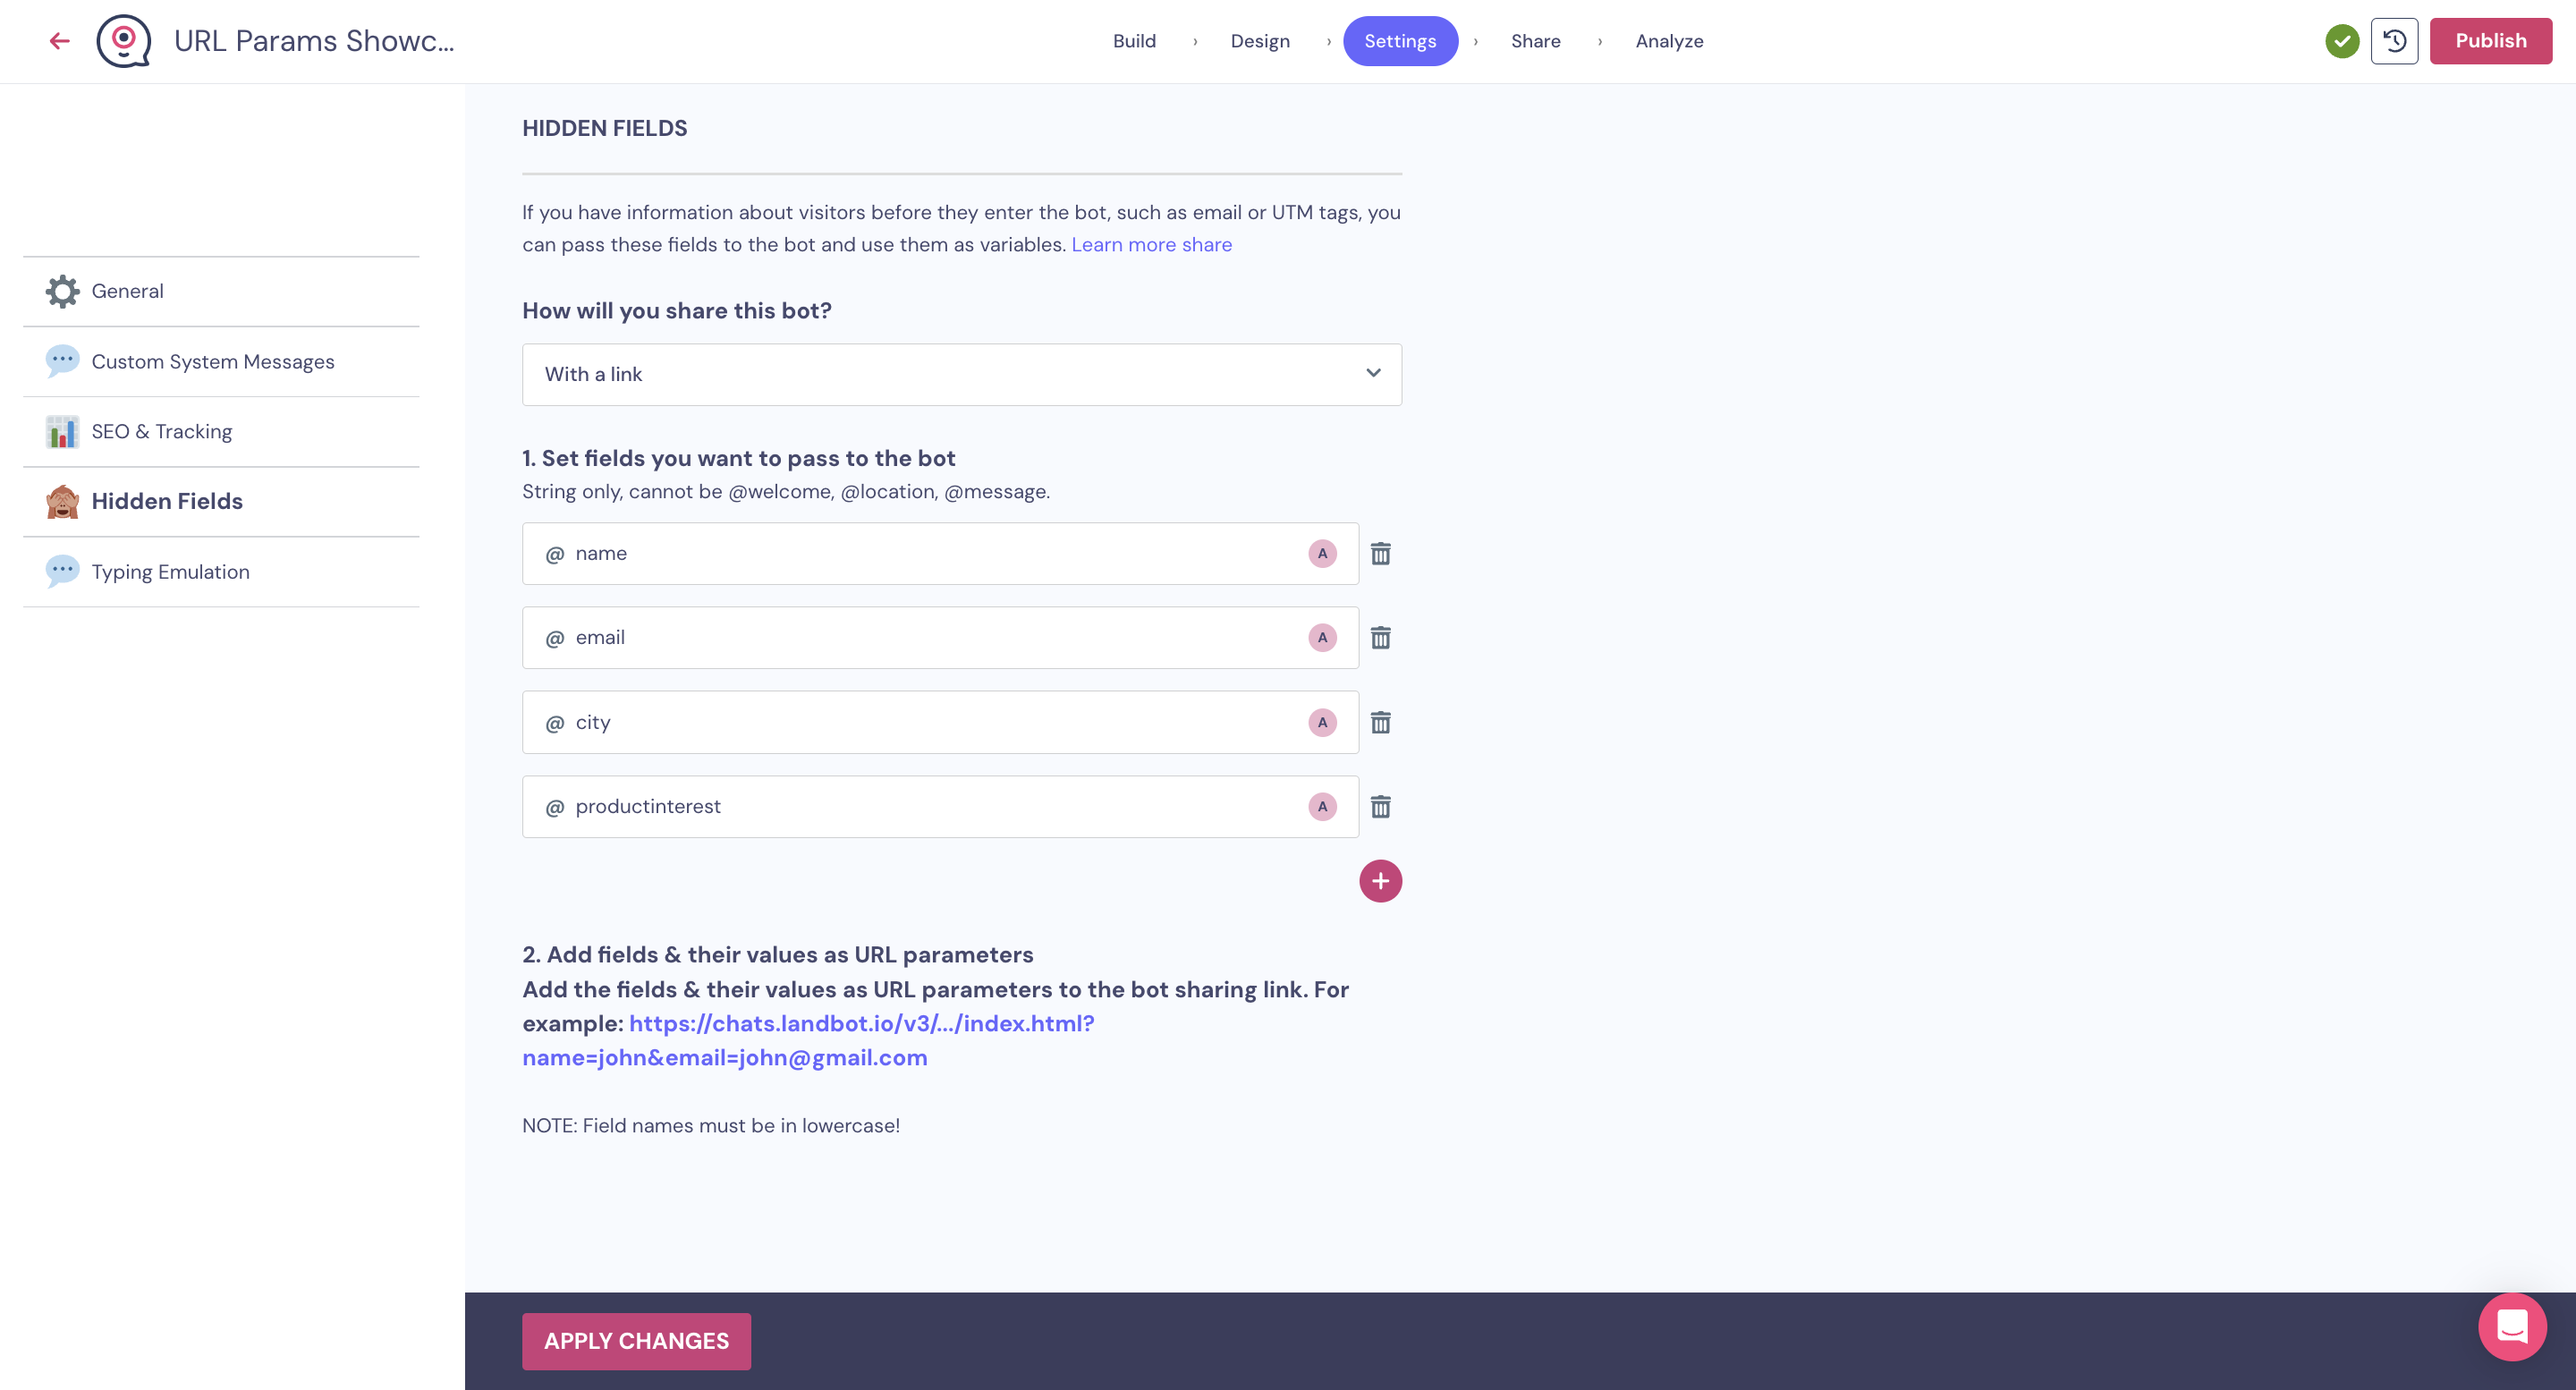
First step: Settings > Hidden Fields
First, set up the bot to recognize the information it will use during the conversation. Go to Settings > Hidden Fields and set up each parameter as a variable. Note that this only allows string format, meaning that the information stored in that variable must be text.
Following our example, you should add:
- @name
- @city
- @productinterest
Second Step: Adding Those Hidden Fields to the Bot’s URL
As we did with our UTM params, we need to add the URL params to our URL.
This is how our Landbot URL would look like initially:
https://landbot.pro/v3/H-2627325-ZMOMI8WGG0YARNEN/index.html
And we should include the hidden fields as we did:
https://landbot.pro/v3/H-2627325-ZMOMI8WGG0YARNEN/index.html?name=*[name]*&email=*[email]*&@city=*[city]*&productinterest=*[blockchain]*
Note that we’ve marked the dynamic content with *[ ] *, but you’ll need to replace it with the merge tag used by your CRM or the database where your leads’ information is stored to ensure the bot can effectively retrieve it.
Important additional notes:
Note that if you want to add both UTM and URL parameters to your URL simultaneously, whether you choose to add your UTM or URL parameters first doesn’t matter—the order isn't important.
Also, you should know that some restricted keywords are not allowed as hidden fields.
Ultimately, take into account that whether you’ve chosen the link option or the embedded one, your bot will apply this setting indistinctly.
Bonus Track - The Analyze Section
We couldn't fail to mention the value that our ‘Analyze section’ can bring you to get your chatbot analytics. You can easily view the information at a glance and filter by important parameters such as the location where most customers have engaged, their preferences, and more. Plus, you can generate custom reports to make informed decisions. We dedicate an entire part on our Knowledge Center to explain everything about this section.
Conclusion
In conclusion, getting to understand how to use UTM parameters, URL parameters, and hidden fields in Landbot provides powerful tools for tracking, personalizing, and optimizing your lead generation strategies.
Implementing these techniques can help you gain valuable insights into user behavior, tailor experiences to individual leads, and streamline your marketing efforts. Whether you're running paid campaigns, nurturing leads post-webinar, or seeking to improve overall conversion rates, these methods offer the flexibility and data-driven approach needed to succeed in today's competitive digital landscape.
Remember, the key to success lies in thoughtful implementation, continuous analysis, and iterative improvement of your lead generation processes.
.avif)


.avif)

.avif)
%20(1).png)
.avif)