

.avif)
.svg)
Please note that 'Variables' are now called 'Fields' in Landbot's platform.
Ever since the Formulas feature joined the Landbot builder repertoire, the possibilities of what you can achieve with your conversational assistant expanded exponentially. Though, being a marketer inside and out, my favorite Formulas application is in lead scoring.
As I pointed out in my article on lead scoring best practices, Formulas is the most complex of the ways you can score leads with Landbot. However, it’s also the most powerful one as it allows you to keep thighs simple among all that complexity.
You have been warned, this is no theoretical lead scoring guide.
So, let’s get down to it!
What Will You Need?
Before you get started with the bot-building process, prepare:
- List of the necessary scoring questions
- Assigned numerical scoring for each of the questions/answers
- Scoring segments
- Landbot account (Free Trial or Pro Subscription)
Only if all of the above is set and decided, proceed to follow the tutorial below!
Using Formulas for Lead Scoring: The Easy Way
Formulas block works much like formulas inside an Excel spreadsheet. You can use it to modify formats, carry out complex calculations, etc.
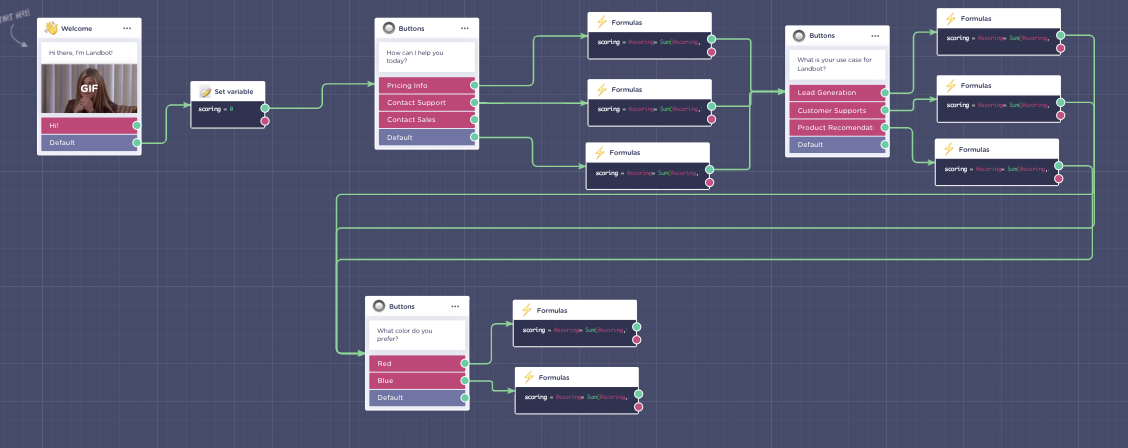
The simplest way to use this feature for lead scoring is to add the block of formulas just after each question. It gives a bit more work, but it’s much easier to understand - meaning maintenance and adjustments will also be easier to apply.
So, to see how to set a traditional sales lead scoring system inside your chatbot, follow these steps to the dot!
1. Create a Bot from Scratch
First, access the Landbot dashboard and click to create a bot from scratch as Formulas do not appear in any of the current templates.

2. Create a Variable to Store the Final Score
Next, before you move to build your conversational flow, draw an arrow from the Welcome message block and set up the “Set Variable” block.
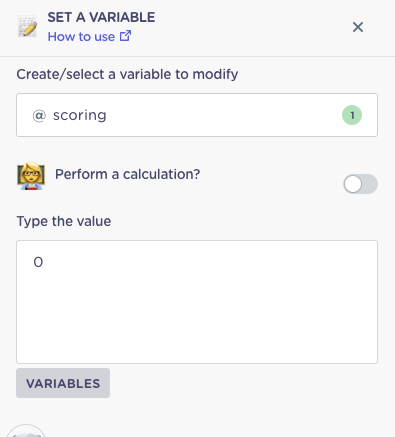

In the block’s Settings, create a name for the variable under which you wish to store the lead scores, in our case @scoring. Then set the variable value to 0.
3. Add a Question Block in Buttons Format
Add your first scoring question in the Buttons block format:

Alternatively, you could also use the open-ended text question. However, use of free input does complicate the process a bit. If do though, make sure to use Keyword Jump afterwards, a feature that will allow the bot to analyze the input.
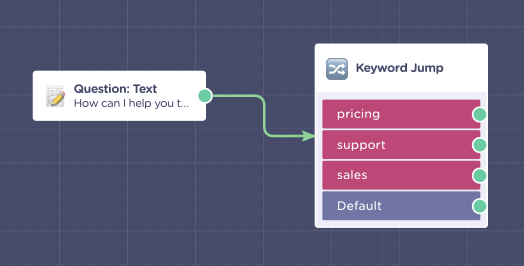
Nevertheless, even with the Keyword Jump, open text answers are likely to complicate your scoring. People express themselves in many different ways for you to account for every situation. Even if you do, there are always typos! So, unless you really, really have to, stay away from the open input!
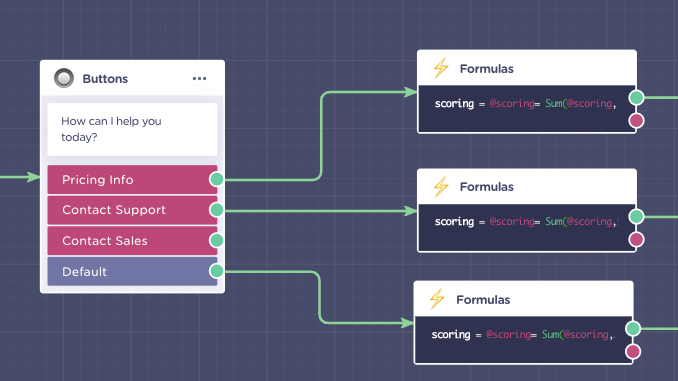
4. Add the Formulas Block to Sum the Scoring Results
Now is the time to add our first Formulas to sum the points of each answer. In my example, the points are awarded as follows:
- Pricing Info +10 points
- Contact Support +5 points
- Contact Sales +20 points
If this is your first time dealing with formulas, you might wanna watch this video first. It will give you a better idea of what the block is capable of:
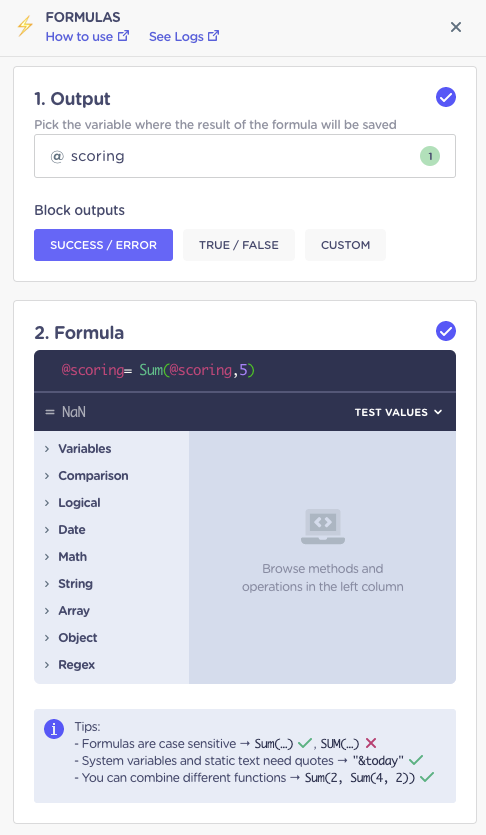
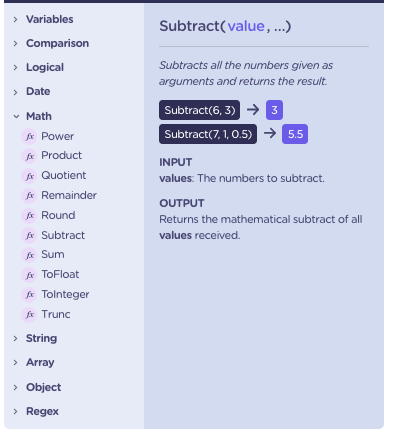
Open Formulas’ Setting section.
In the “Output” field, insert the variable you want to create or (as in our case) update. In the “Formula” field, simply type the following formula “@scoring= Sum(@scoring,10)” (to add) or “@scoring= Substract(@scoring,10)” (to subtract)
Repeat this process for each answer of the question by simply duplicating the Formulas block and modifying the value you want to add or subtract.
Please note, if you are ever in doubt about the correct format of a formula, check the library under the Formula input field. It will tell you all you need to know:
5. Repeat the Process for Each Question
Then, connect all the Formulas blocks to the next question and repeat the same process again. Do so until you’ve asked all the questions on your list.
6. Segment Leads Using Conditional Logic
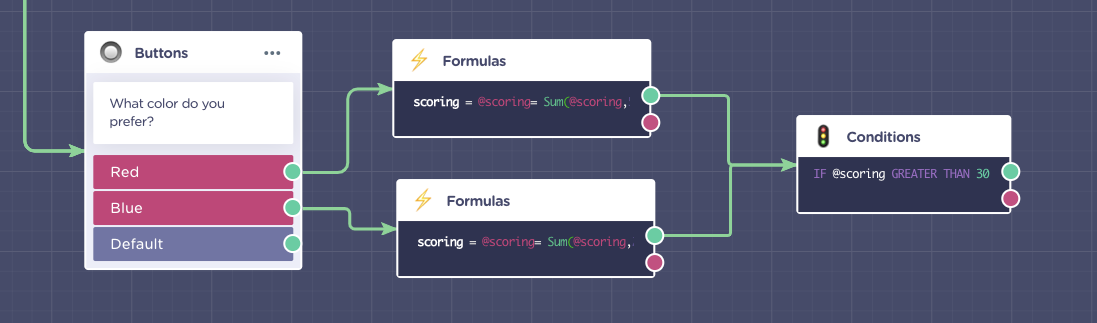
After all the questions and answer scoring is in place, it’s time to apply the good old Conditional Logic block to segment the leads.
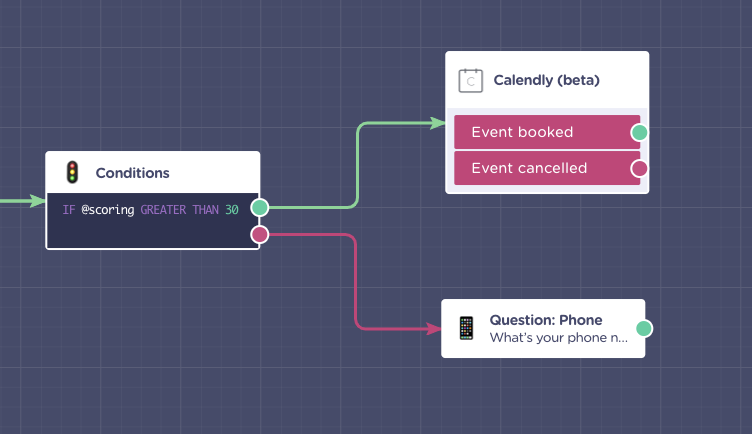
I set up the first condition to separate all the scores that are higher than 30:
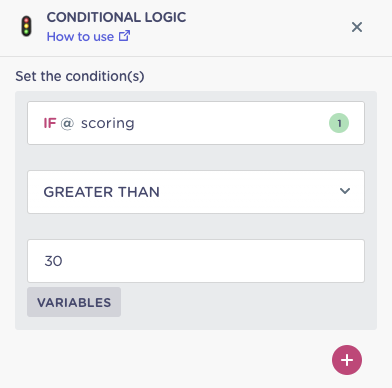
If the score is higher than 30, it will follow the green path, and if it’s lower, it will follow the red path.
7. Design Personalized Paths
Splitting the flow after scoring segmentation, lets you personalize the path based on leads value.
For example, if the result is 30+ (meaning the lead is of high quality) my flow pushes this lead directly to book a meeting with the sales team. However, if the scoring is lower, the bot simply asks for a phone number so the sales team can contact them later.
You can be as thorough in the path segmentation as you wish, sending weak leads on a nurture path peppered with content, connect others with product demo or offer discounts. All without ever leaving the flow!
NOTE: If using your bot for sales, it’s fascinating to integrate your scoring flow directly with a CRM such as SalesForce or Pipedrive.
Observations
In this tutorial, I tried to introduce you to using Formulas in the simplest way possible.
Though, this block allows you to perform pretty much any operation and opens a well of possibilities. As you get used to working with Formulas, don’t be afraid to experiment and create more complex operations.
For example, there are variables such as country or device type that Landbot can detect automatically, and Formulas can be used to capture and score this type of data.
.avif)


.avif)

.avif)
%20(1).png)
.avif)