


.svg)
Please note that 'Variables' are now called 'Fields' in Landbot's platform.
Before we start, I need to tell you something: the first time I built a chatbot was just before writing this tutorial. It could have gone terribly wrong, I could have panicked, and we would have ended up with the article being me crying out for help, or simply with no article at all.
But luckily, the bot builder was easy to master, even for a newbie such as myself, I was successful in my task, and here we are — with a fresh tutorial to help you along.
Now, on to the bot. As we are still wrapping our brains around living with COVID-19 among us, in many countries it is now a legal requirement for certain businesses such as bars, clubs, restaurants, and others in the tourism, hospitality, and cultural sectors to collect customers’ contact details for tracing purposes in case one of them, or a member of staff, tests positive.
A visitor registration bot for tracing purposes is a great way to do it, so we thought we’d walk you through building one.
When, Where, and How to Implement your Registration Bot
This type of bot offers real-time data collection and a more pleasant user experience than if you were to have, for example, each customer fill in an on-paper registration that
a) could get lost;
b) would probably take a bit too long to complete;
c) would imply disinfecting the pen or pencil after every use.
The bot can be used in different ways.
You could also ask customers to register online beforehand, the other can be by having them scan a QR code on-site with their phones and access the bot just before getting in. Or, a third option, have customers fill it in using a tablet provided by your establishment.
This makes the registration bot a very flexible option that can be adapted to each use case!
If we’re talking about a concert venue or a restaurant, it can sit on the reservation or purchase page and ask customers to share their contact and visit information beforehand, perhaps with a restaurant reservation template, issue them an email confirmation with the data and proof they could show on the door.
On the other hand, if it’s a club or pub with no reservations or a restaurant where walk-ins are welcome, managers can ask clients to quickly register on a screen or on their own phones before going in.
Whichever one you choose, your customers will be ready to enjoy their meals, stays, or drinks, and you’ll have all data collected in real-time, in a way that’s easy to store and manage later on.
So let’s get to it!
Step-by-Step Guide to Building Visitor Registration Bot
For this tutorial, let’s assume you are the owner of “The Botty Leprechaun” pub and are registering all customers coming in on a Thursday.
First, you’ll need to sign in to your Landbot account (or sign up for free!).
It’s a code-free chatbot platform that turns bot building into a game of drag-n-drop:
Once inside the Landbot dashboard, click “Build a chatbot” and select your preferred channel. I’ll be building a web chatbot:
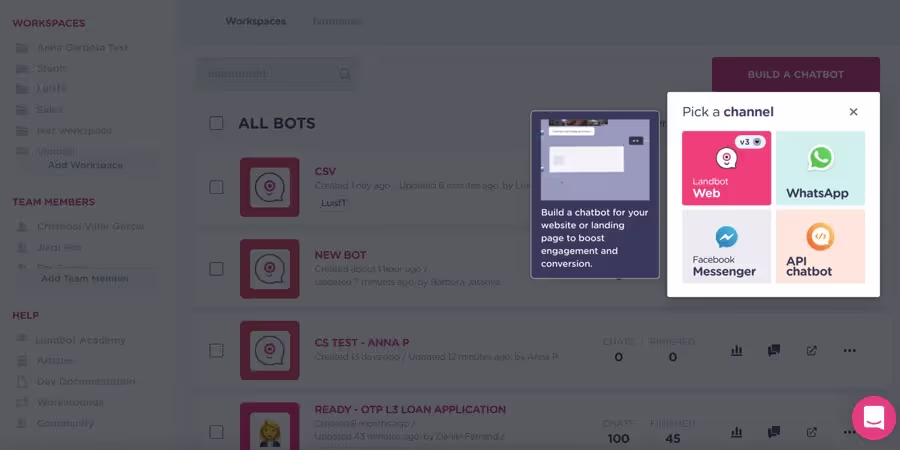
So, let’s build your visitor registration chatbot for effective contact tracing!
1. Welcome Message
Welcome Message block is the only element you’ll see on the canvas as you open the Landbot builder app.
You can’t delete a Welcome message as each bot has to have one but you can customize it completely to match your requirements.
Ideally, in the welcome message, you’ll let your customers know about the purpose of the bot. In this case, you are informing them the data collected will be used for COVID-19 contact tracing purposes. Something like this:
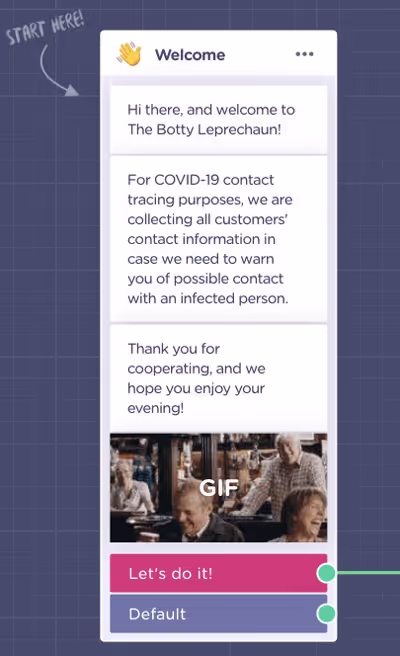
In addition to stating the bot’s purpose, the Welcome Message is a great place to set the tone, voice, and personality of the bot, using but also by including a GIF.
2. Ask for the Customer’s Full Name
Landbot makes bot building easier by providing you with a selection of pre-formated questions (name, email, phone, URL, etc.) and formats (buttons, carousel, rating, free-text, etc.).
After the Welcome Message, start by asking the customer’s name by dragging the green arrow to add a new “Name” question. You can keep the pre-set wording or personalize the question.
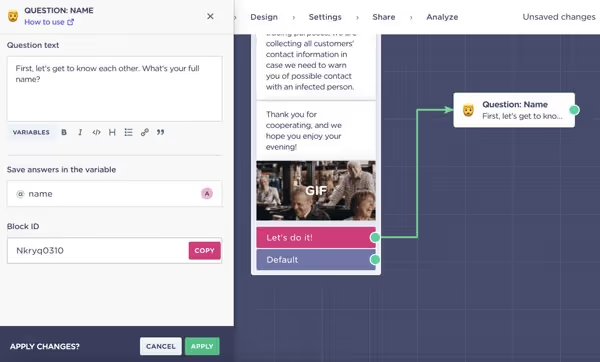
In the block editor on left side of the screen, you can customize the pre-set question for something more personalized to your business.
Below, there is a variable field with a pre-set @name variable. It enables you to save user answers which can be viewed in the “Analyze” section of your bot (top nav bar) or it can be used to export the date to Google Sheets (but about that later).
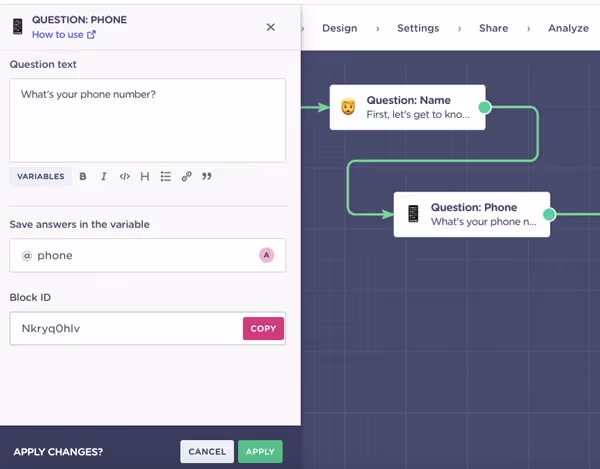
3. Ask for Their Phone Number
Next, it’s time to ask for the customer’s contact information.
Let’s start by asking for their phone number by adding a “Phone” block. The block will include the setup message “What’s your phone number?”, which you can easily change to something like “Can I have your number?”
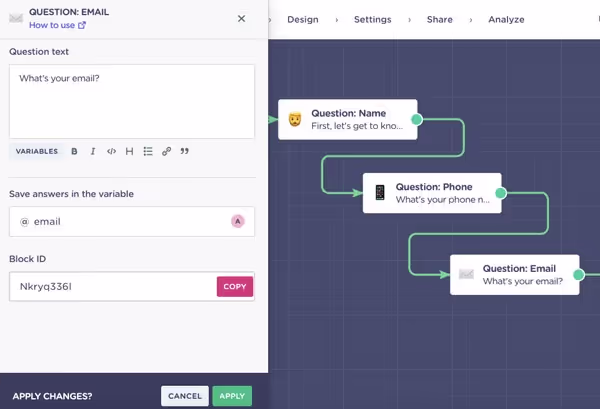
4. Request the Email Address
In addition to the phone number, you’ll want to request the customer’s email address (because let’s face it, who even answers their phones anymore?).
Same as before, the block comes with a pre-set message that you can edit to better fit the bot’s personality:
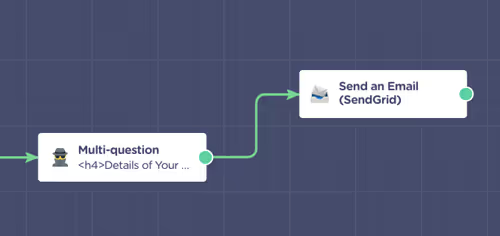
5. Confirm Date and Time of Visit
After collecting the basic name and contact information - since this is a visitor registration bot that serves for COVID-19 tracing purposes - you’ll need to know the date and time of each person’s visit to the pub.
You can do so by adding a multi-question block. The multi-question block allows you to ask more than one question within a single message, making it easier for the customer to provide all the relevant information.
Think of it like a mini-form inside a conversation!
When you insert the block into your flow, you will see a slightly different editor that that of the previous blocks.
You have the “question” field to issue instructions but then, instead of a single answer, you can add as many fields to your mini-form as needed:
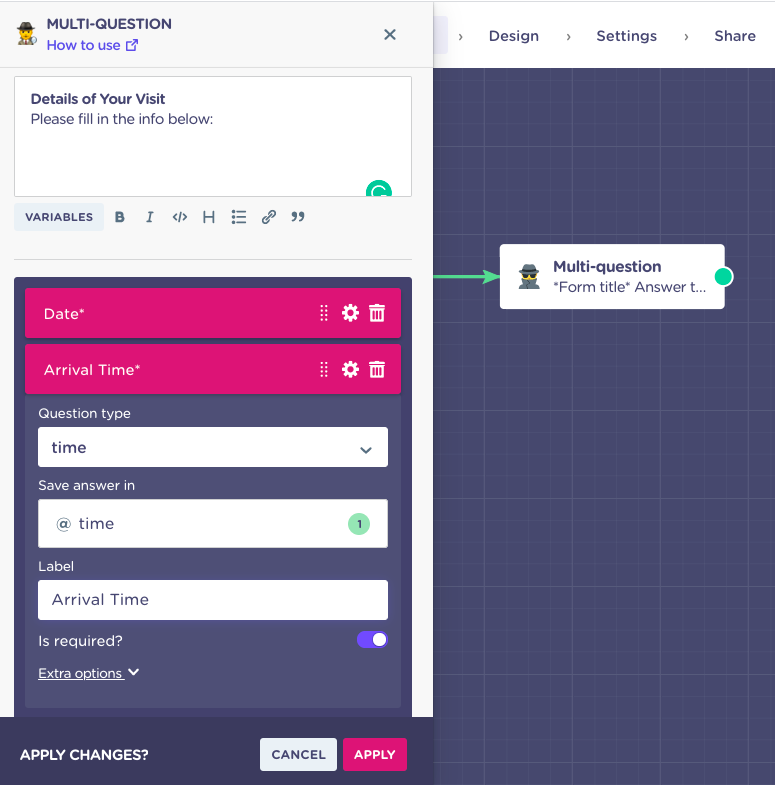
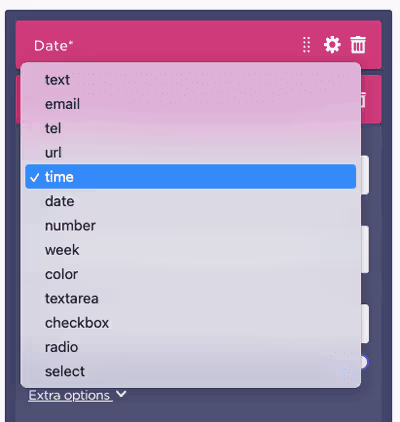
The block allows you to set-up a specific format for each new field:
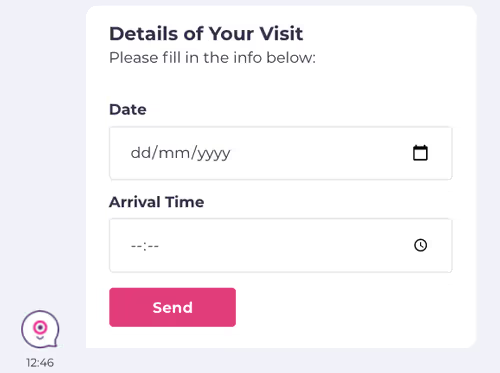
Because I selected an appropriate formatting for my date and time information request, the front-end user-experience will be much simpler and pleasant:
PS: Be sure to create a variable for each of the fields in the MultiQuestion Block. I created variables @date and @time to correspond with the data I am collecting.
6. Send Email Recap to the Customer with the Data Provided
Once you have collected all the needed information, you’ll still need to add a block to send an email to the customer, for them to get confirmation and a recap of all data they have shared with the bot.
In this block, you can select the address the email will be sent from, as well as type in the text for the subject and the message.
In the e-mail message, make sure to include all the variables (name, phone number, date, etc.) you collected from the customer.
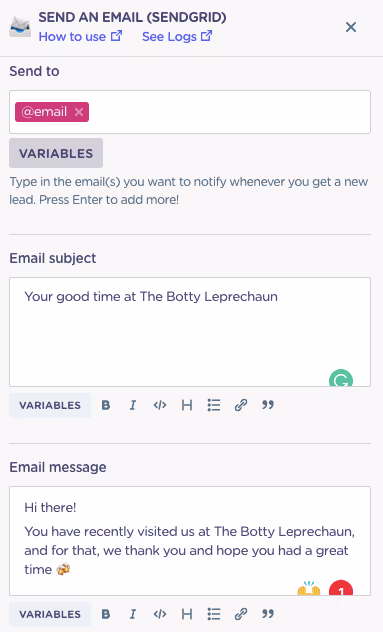
When the customer reaches this point in the conversation, it will drigger and automating email notification!
7. Add a Google Sheets Block to Export the Collected Data
As mentioned above you can review all the data in the “Analyze” section of the bot:

However, you can also export the data to an external database such as Google Sheets.
You can easily do so by adding a “Google Spreadsheet” block:
You just need to make sure to create the spreadsheet beforehand where you want to record the data with a column for each thing you asked the customer.
Then, when you add the block, you’ll need to connect your Google account with Landbot, link the spreadsheet to the bot, and select the action you want the integration to carry out.
Since you want to add new information to the sheet for each customer, select “insert a new row” and add all the variables you want to record in each column.
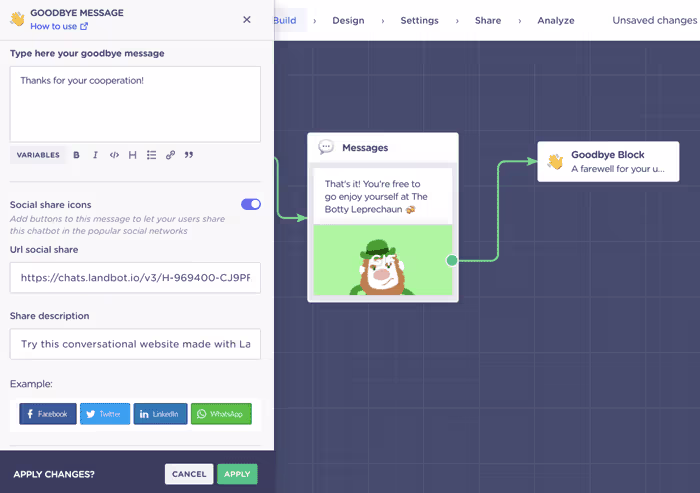
8. Finally, Say Goodbye
This is all the information you need from your customer, so you can go ahead and say goodbye now by adding a “Goodbye” block with the message you want to show your customers as they leave the bot to go enjoy themselves at the pub.
9. Adjust Bot Design
Once your flow is all set-up, it’s time for the fun part - design!
The Design section in the top navigation bar of the builder, gives you everything you need to make the bot truly your own. You can customize everything from layout and font to the shape of the chat bubbles:
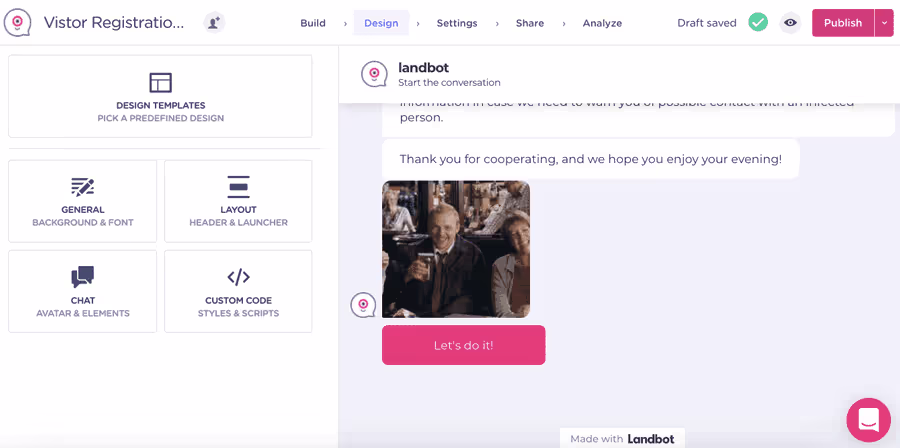
It’s best to use our brand colors & style.
10. Preview & Share your Bot
All that’s left now is preview and share your creation:
My experiment turned out like this:
To Sum it All Up!
As I mentioned at the beginning of this tutorial, this was my first time building a bot, let alone a visitor registration one.
The verdict?
It was almost as easy as drinking a beer at the pub!
Now it’s your turn to give it a try!👇👇👇
.avif)


.avif)
%20(1).png)
.avif)